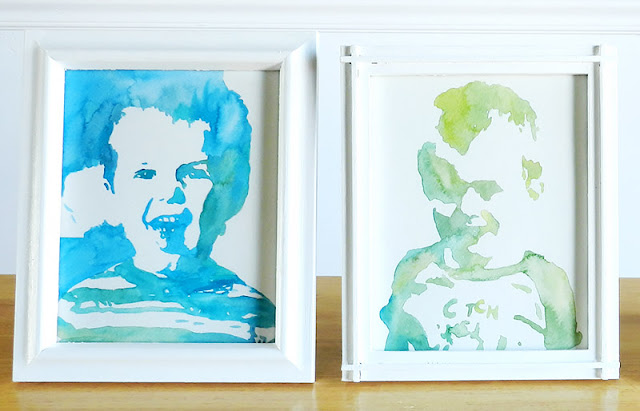
I'm still working on decor for the bare walls of my home. I have lots of family photos to hang, but I wanted something with more color..... so I opted to created some bright watercolors of my son and created a tutorial to share!
Now you may be thinking that this is way too hard, but it is WAY easier than it looks. If you can trace an outline and color it in, you can do this!
computer
digital photo of a person
printer
printer paper
pencil
watercolor paper
watercolor paints
paintbrushes
Step 1: Find a nice digital photo of your subject with an even amount of light and shadow on the face. This can be kinda tricky. If there's too much light or shadow on the face, you won't have enough definition to make this work. So you may have to try this with several photos to see what works best. Finding the right photo is key!
Step 2: Open the photo in PicMonkey, a free online photo editor. You can use another editor if you like, but I'll explain the next steps in terms of the picmonkey editor.
Step 3: In PicMonkey, select the Effects option on the left sidebar. It's the second symbol down from the top. In Effects, select the Posterize option towards the bottom of the sidebar ( I've circled that one below also).
Step 4: In Posterize, slide the number of colors bar down to 2. It's important to have only two colors here. This project won't work with any more colors or any less. Keep the detail at 80% and the fade at 0%. Then hit apply.
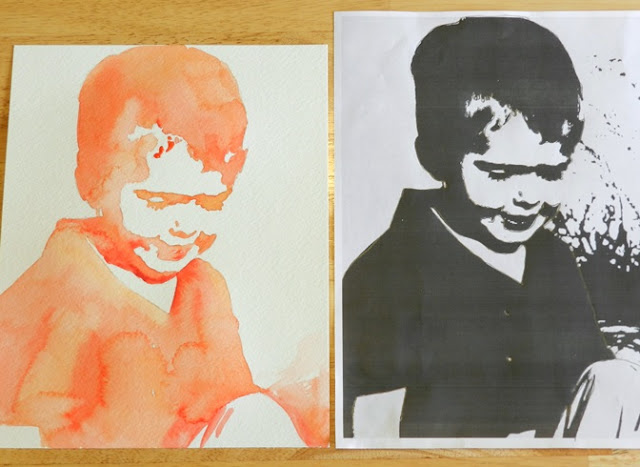
Your photo should look like this now. Only one light shade and one dark shade.
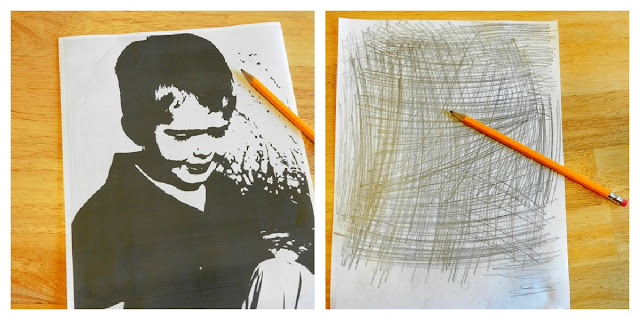
Step 5: Decide on the size of painting you want to make and print out the digital photo in black and white in the size that you desire. I printed mine to fill a whole 8 1/2 x 11 piece of copy paper and it worked well to make an 8 x 10 painting.
Step 6: Once you have your printed photo, flip it over and color over the entire backside with a regular pencil.
You may be wondering why you are doing this, but trust me.... there is a reason. The pencil graphite will help you transfer your image onto the watercolor paper. So fill it in the best you can!
Step 7: Flip your paper over so the photo side is up and place it directly on top of the watercolor paper. You need to make sure the paper doesn't shift or move during the next steps so it may be a good idea to tape it down.
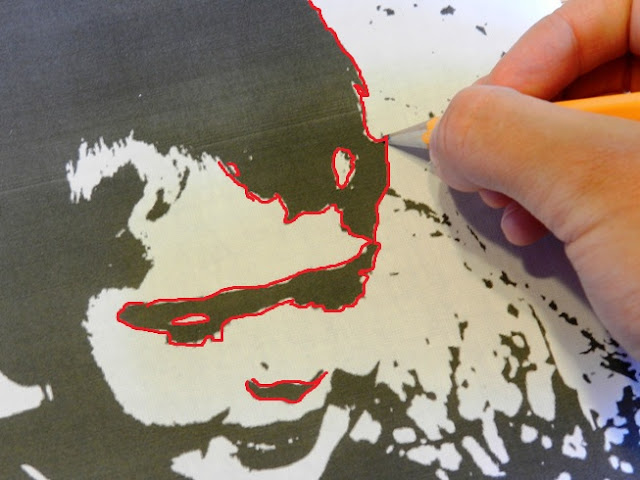
Step 8: With a sharpened pencil, press firmly to trace the outlines of the face. I've outlined in red in the photo below some of the areas I traced to give you an idea.
I traced all the black outlines of the face and then moved down to trace the outlines of the neck and shoulders. Depending on your particular photo, you may want to leave the background out. For this one, it worked best to leave it out.
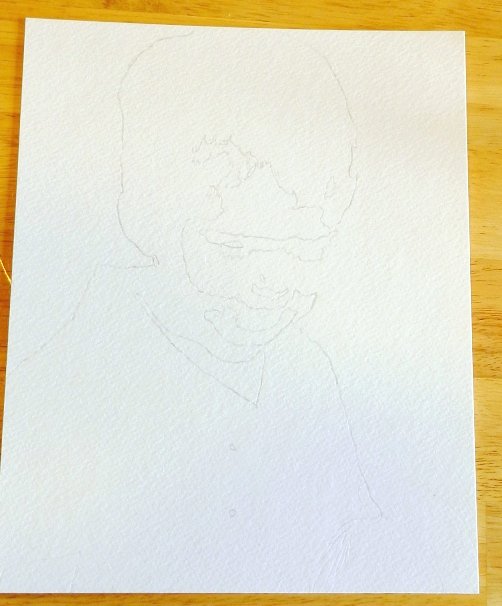
Step 9: Once you have the whole image traced, take the printed copy off to see the image transferred onto the watercolor paper.
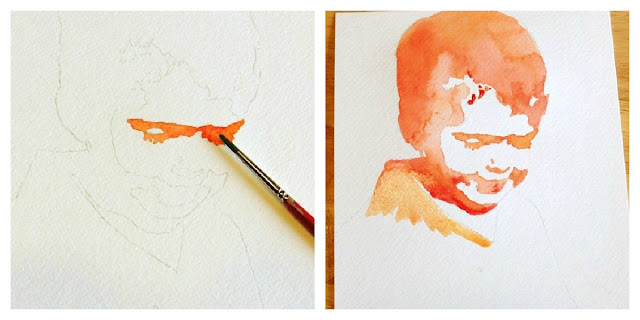
Step 10: Now it's time to add some watercolor! Select a color and carefully start painting inside the lines you traced. Keep your printed copy handy to make sure you are painting in the right spots.
Tip: To give the portrait a more varied look, try adding just a hint of another color on certain areas. I added a touch more red in some areas and left others more orange-y.
Step 11: Fill in the entire portrait and let the paint dry and finally... You Are Done!
Photos and tutorial are copyright protected: Elise Engh 2012. Please do not copy or use photos without permission. Thank you.



No comments:
Post a Comment
Note: Only a member of this blog may post a comment.